
How to post a project
Posting a project on Parker Dewey takes less than five minutes. From your dashboard, click Projects at the top and then Create a Project. View the video or follow the steps below to fill in the details of your project.
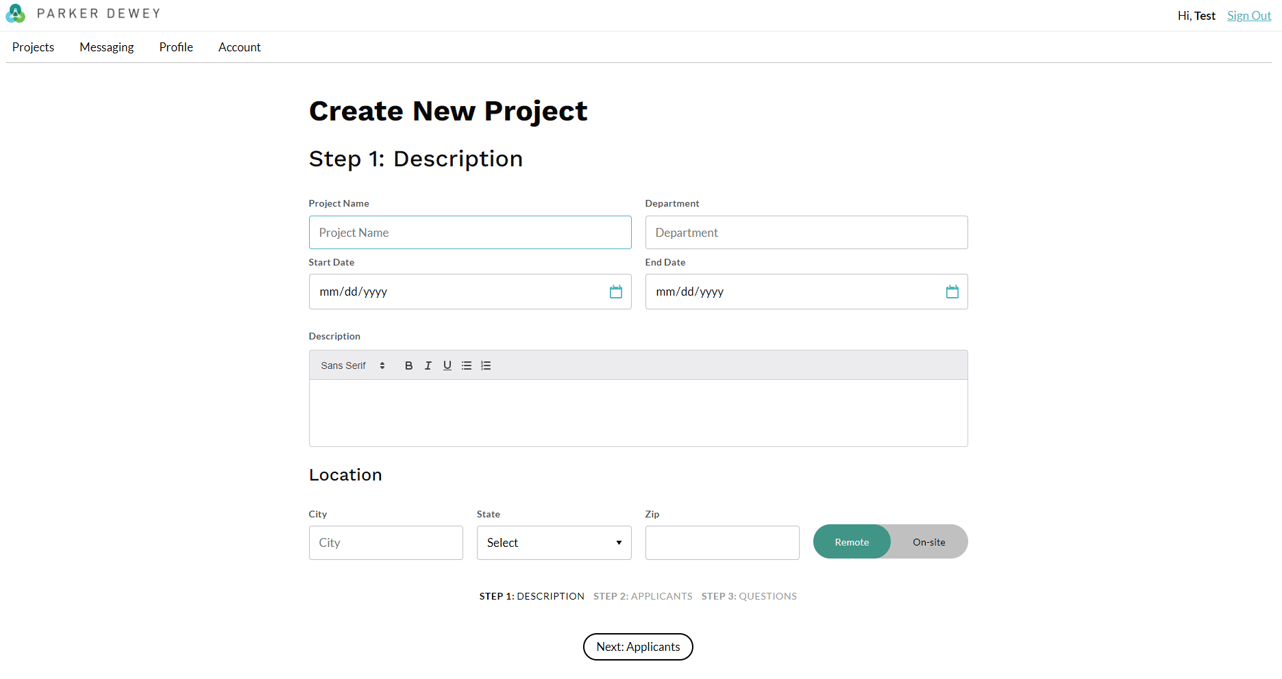
Then, provide the details of your project:
- Project Name: This is similar to a job description and is visible to all Career Launchers before they read details about the project.
- Department: This is the department that is hosting this project (e.g. IT, Engineering, Marketing, etc.)
- Start/End Date: Add a start and end date to the project. Most projects last from one week to one month. If you have hard deadlines, be sure to include that in the project description.
- Project Description: This is an outline of the scope of work. The more details, the better so that a Career Launcher understands your expectations. If you're not sure where to start, check out our tips for posting a custom Micro-Internship project.
- Location: Indicate where your organization is based and whether your project can be conducted remotely or onsite. Over 90% of Micro-Internships are conducted remotely; if this project must take place onsite, be sure to include that as the location.
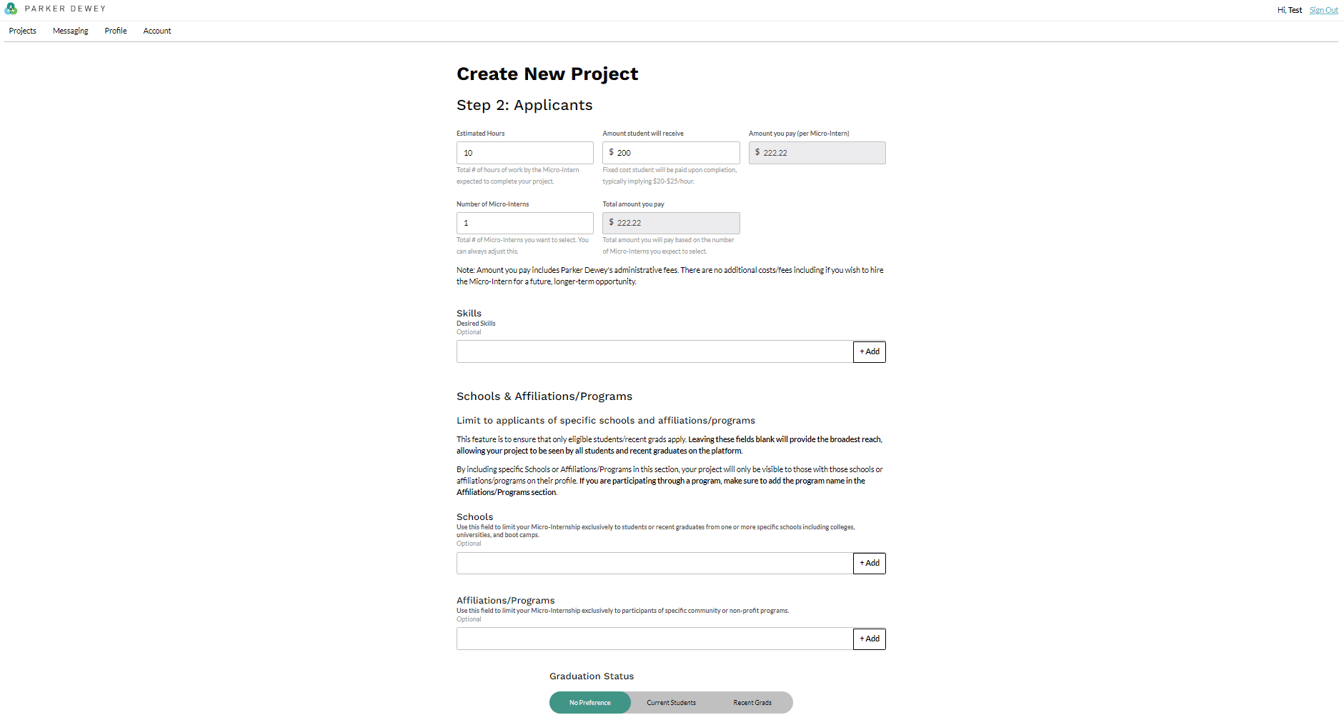
Next, you'll provide applicant information like hours, payment, and affiliation. View the video or follow the steps below to learn more.
- Estimated Hours: This is how long you think the project will take and can help the students understand your expectations. Please note that if you are planning a project that will take multiple weeks, this should be the TOTAL number of hours the project will take (e.g. 5 hours/week x 4 weeks = 20 Estimated Hours)
- Amount student will receive: This is what each Micro-Intern will be paid for the project. All projects on Parker Dewey are paid as a fixed fee upon completion of the project. Most projects equate to $20-25/hour.
- Amount you pay (per Micro-Intern): Our calculator shows the total cost you will pay for per Micro-Intern. This total costs includes all payroll, legal and other administrative fees of the project.
- Number of Micro-Interns: If you would like multiple Micro-Interns, indicate the number you intend to hire. This can be modified should you find additional candidates you'd like to hire for your project.
- Skills: Add Desired Skills that you are looking for such as software that the student would be expected to know/use to complete the project.
- Schools & Affiliation/Programs: You have the option to limit your project to specific schools and/or affiliations. This means that your project will only be visible to Career Launchers with those Colleges/Universities and/or Affiliations listed in their profiles. If you do not select any schools/affiliations your project will be visible to all Career Launchers. Completing this section is completely optional and can always be changed at any time so that your project. You are always able to filter applicants by schools/affiliations when deciding who to select for your project.
Finally, add some questions to your project application so you can quickly evaluate candidates. Questions are one of the best ways to evaluate your applicants. Did they put in the time to write a thoughtful answer? Were there a lot of typos? It's the little details that make a big difference. View the video or follow the steps below to learn more about adding application questions.
The first question is automatically included on every project, but feel free to add more. We recommend no more than five.
Popular questions include:
- How would you approach this project?
- Describe your experience with the task at hand or a similar project.
-1.png?width=950&height=302&name=company%20questions%20small%20(marked)-1.png)
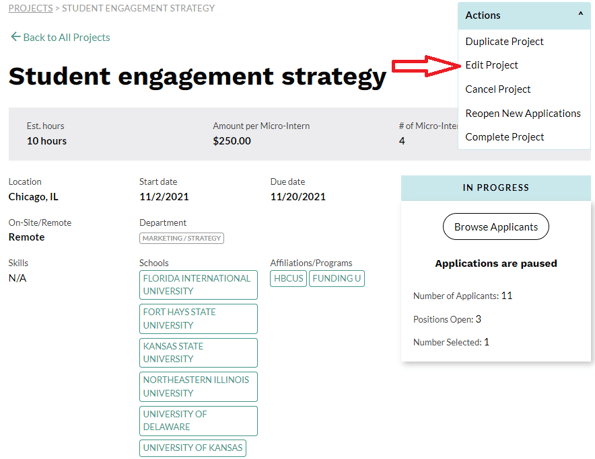
How to edit a project
It's also easy to make edits to your project if things change. In order edit your project, all you need to do is click on the project from your dashboard, click on the Actions dropdown menu, and then click Edit Project. From there, you can make tweaks to the project information. Make sure to hit SAVE when you are finished!
Follow the steps below or view the video to learn more about the Actions dropdown menu.
Fill out some project info, add some questions, click post now, and BAM your project is now live! Now that your project has been posted, click here to learn how to view your applicants.